
How To Deshittify The Pod Pro 3 Mattress Cover
You wake up in a damp bed. No, you're not 6 and scared your Power Rangers bedsheets are about to sit on the front porch covered in a yellow stain for your friends to see and make fun of you for. You're 34 with back problems and debt. Mostly because you spend your money on dumb things like a $3000 bed that you mistakenly thought wouldn't leak. Here's a pro tip for the world out there: Water will find a way. Everything will leak. Don't spend money on something that dies permanently the moment it does.
Can We Patch It? (Yes We Can!) There are a few guys around for how to accomplish a quick patch. Even the tears can generally be patched. But there is a problem: There will always be a patch job after. Vinyl can't just keep flexing and suffering thermal shock over and over and stay sealed. The process everybody seems to agree on (myself included) seems to be using a little dab of Flex Glue and a vinyl repair patch. I'd say if you do this for your first through 5th leaks, you will be ok. After that, you are going to need another solution.
So What Can We Do? It's funny that the way to fix this permanently (or at least much stronger than the factory made it with negligible loss to cooling) is a $20 roll of vinyl tube. No, seriously. You will need less than $50 in materials for both sides:
- 2 50ft rolls of 1/4" ID (3/8" OD) Vinyl Tubing (Or rubber if you rather... anything flexible).
- 4 1/2" Hose Clamps
- A whole bunch of velcro cable ties
That's all this takes. As for tools, all I needed was a pair of scissors. You might do well to have something like a dowel rod to fish the tube through with but it's really not all that necessary.
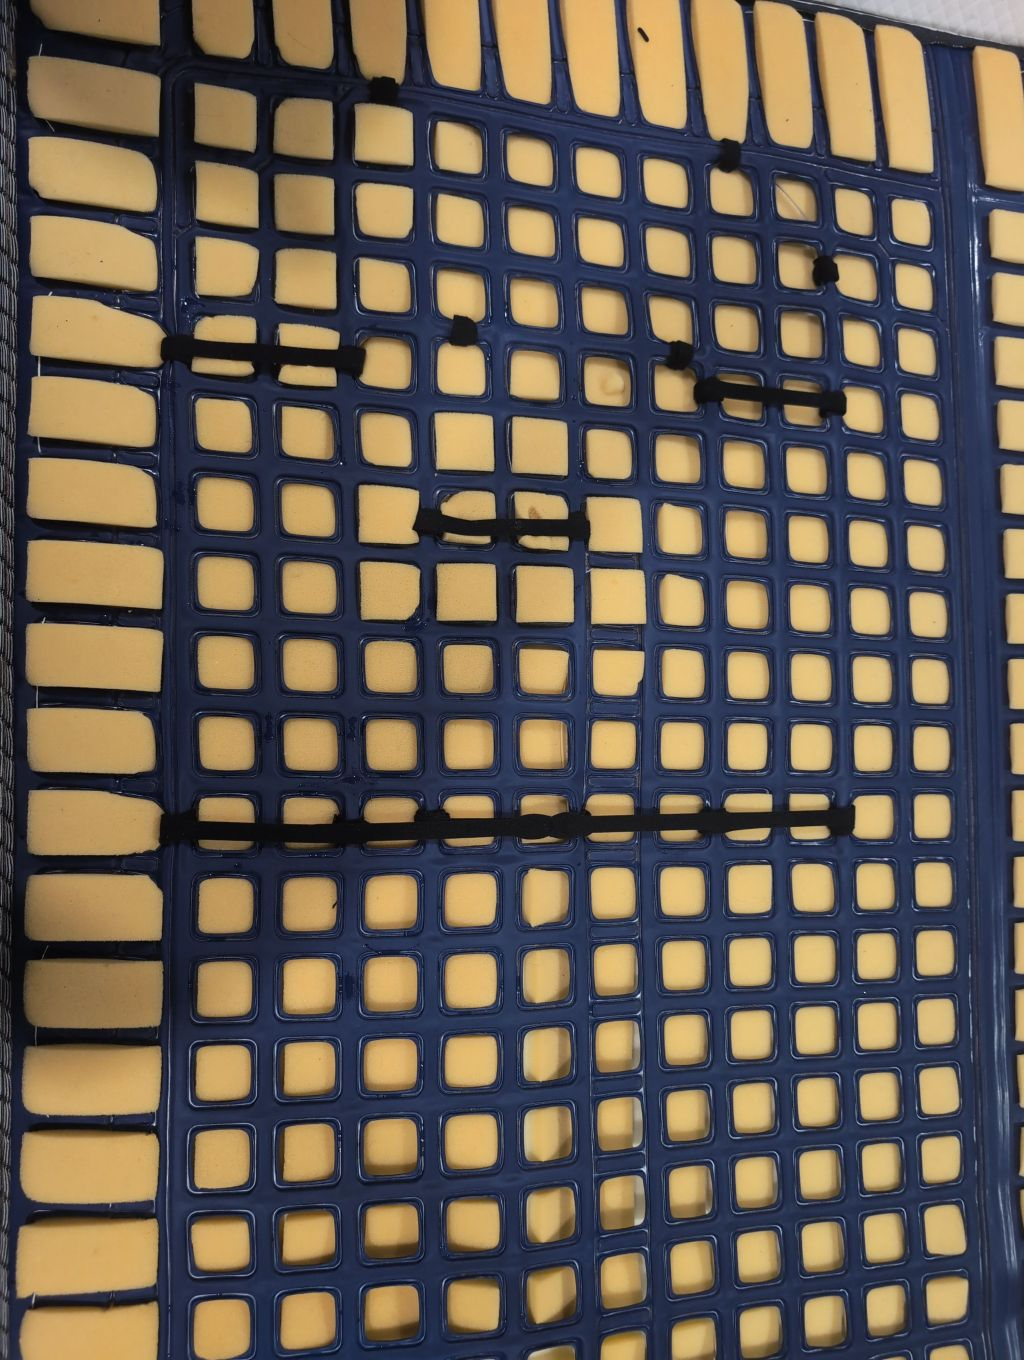
First, you have to be brave. You have to cut the fabric covering the top off. If you are better than me you could always just cut 3 sides and sew on some way to secure it. That's... not in my skillset. So I just remove it and use thick bedsheet. That should leave you with something like...
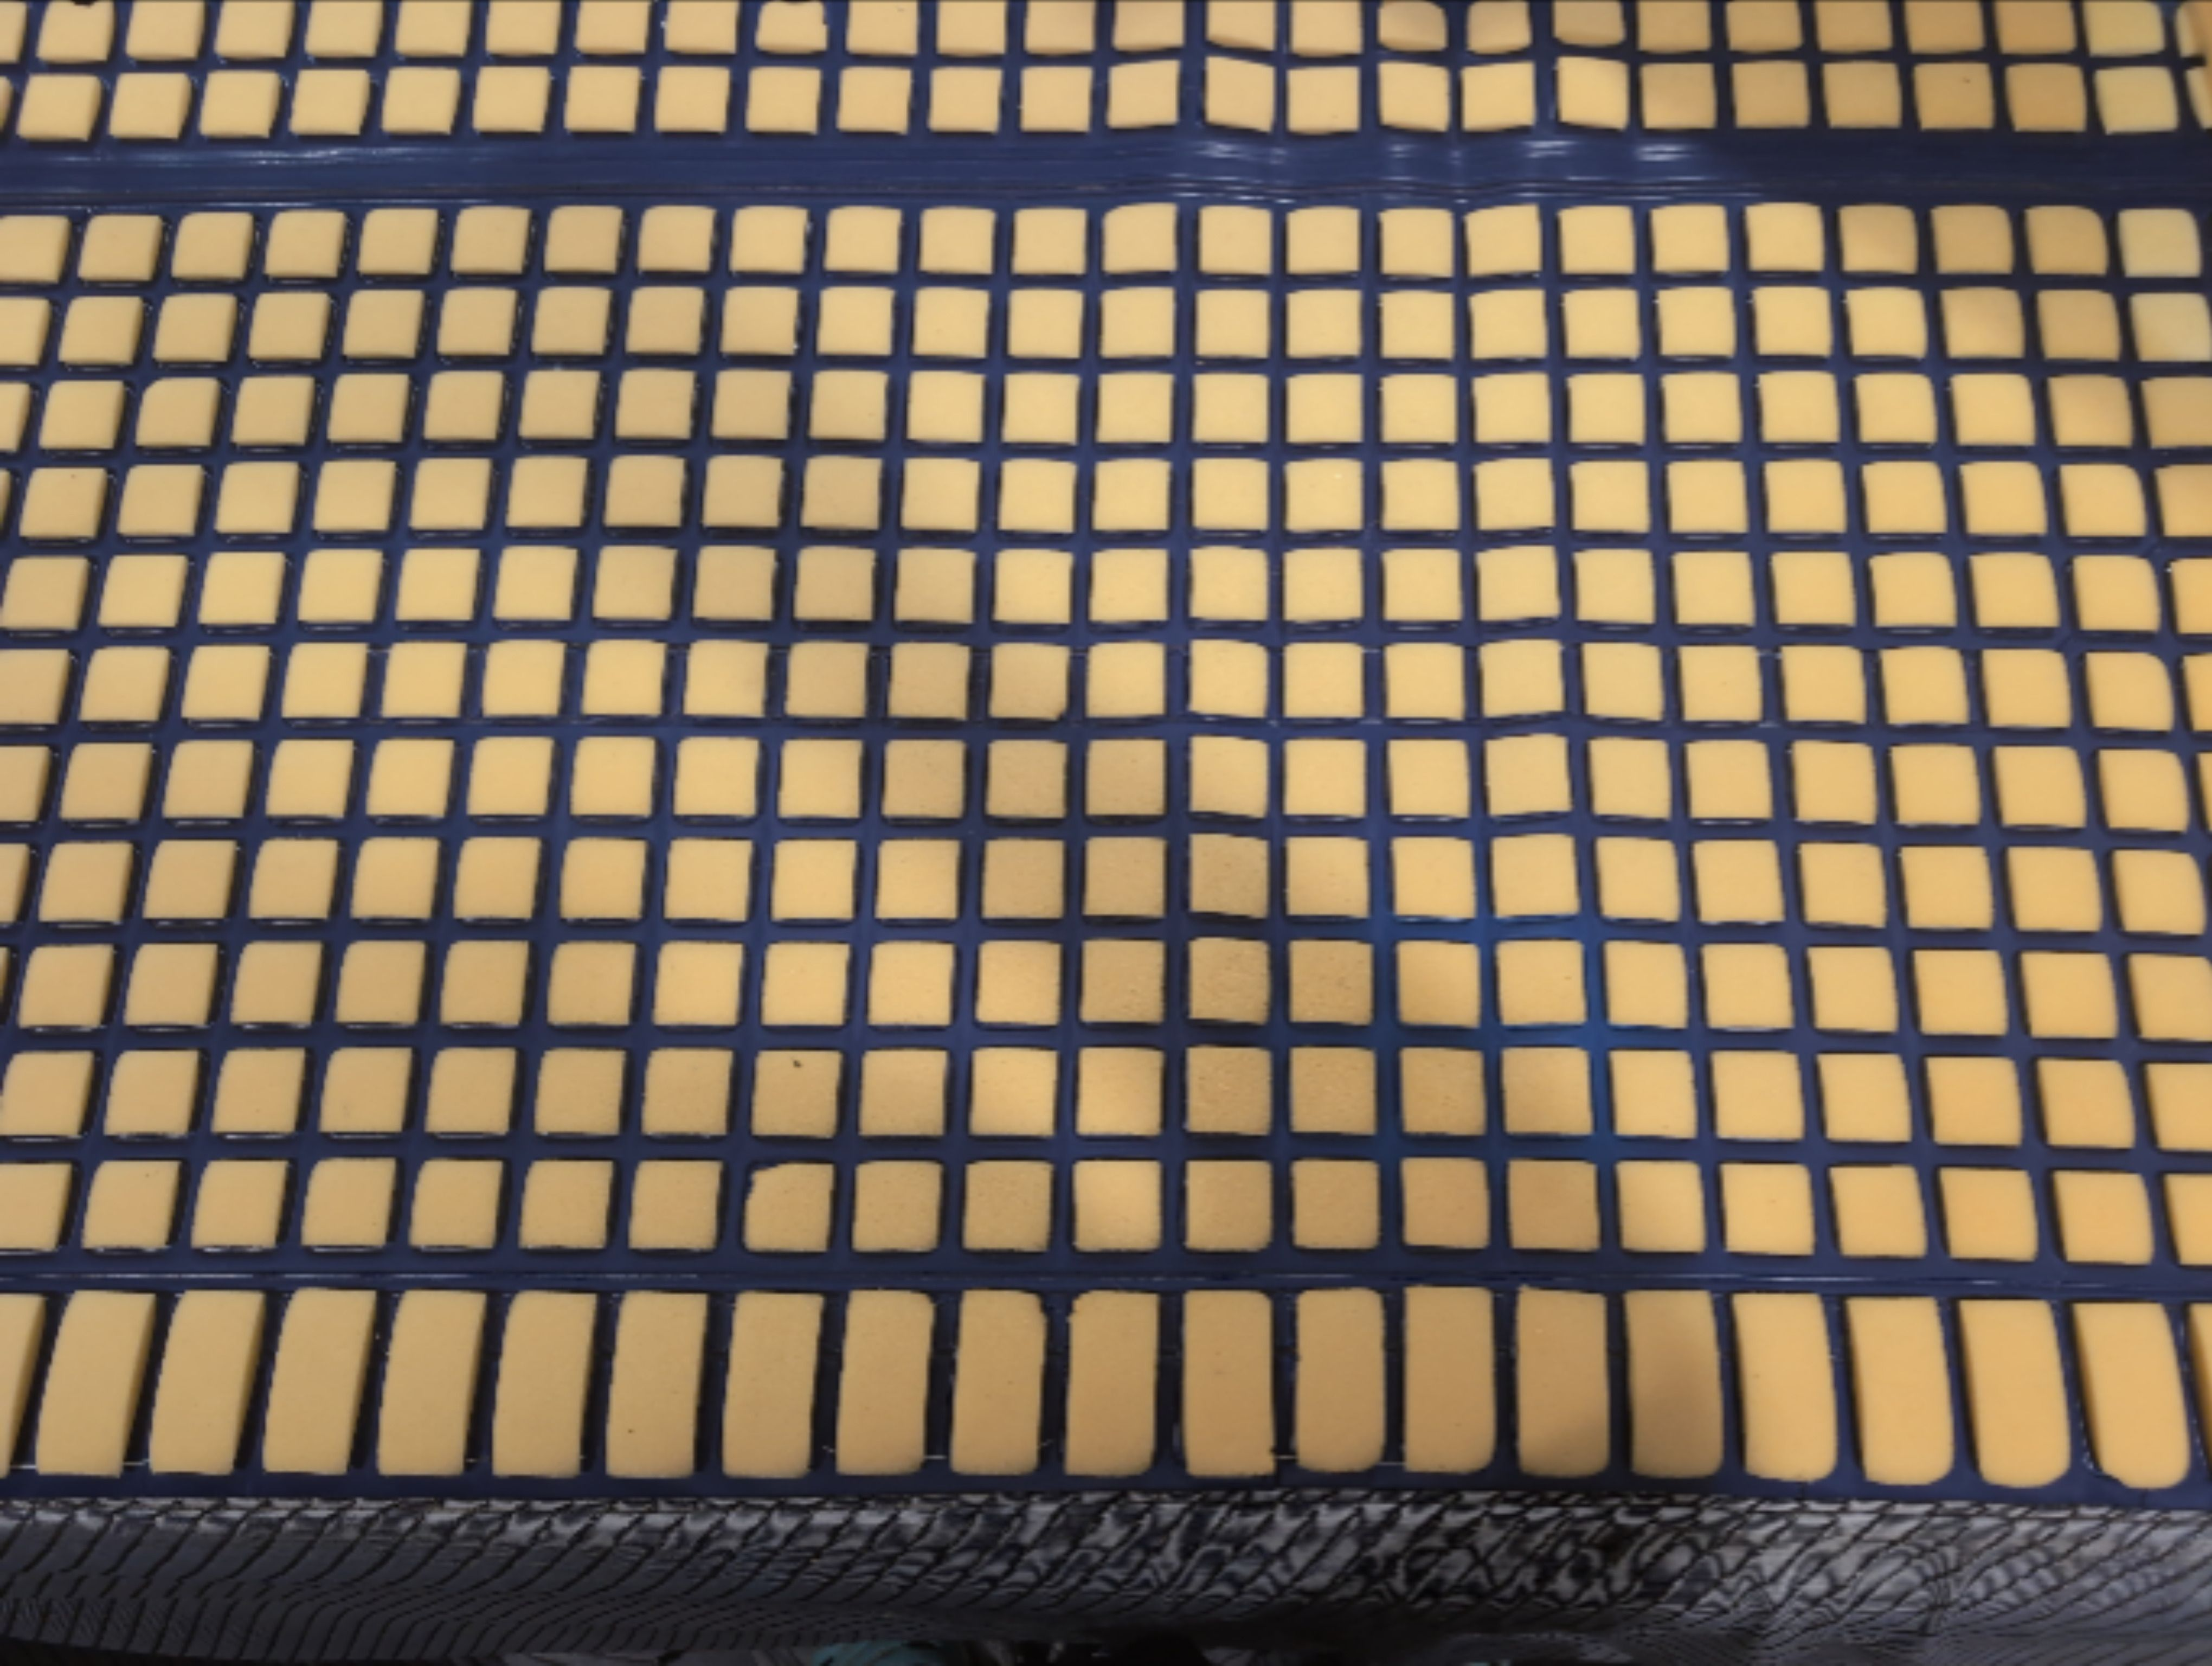
So here is the plan: We skip every other one (because that's how I did it... get 100' and you can use all tubes). We run in in a giant 'U' shape and then switch direction to make a nested U.
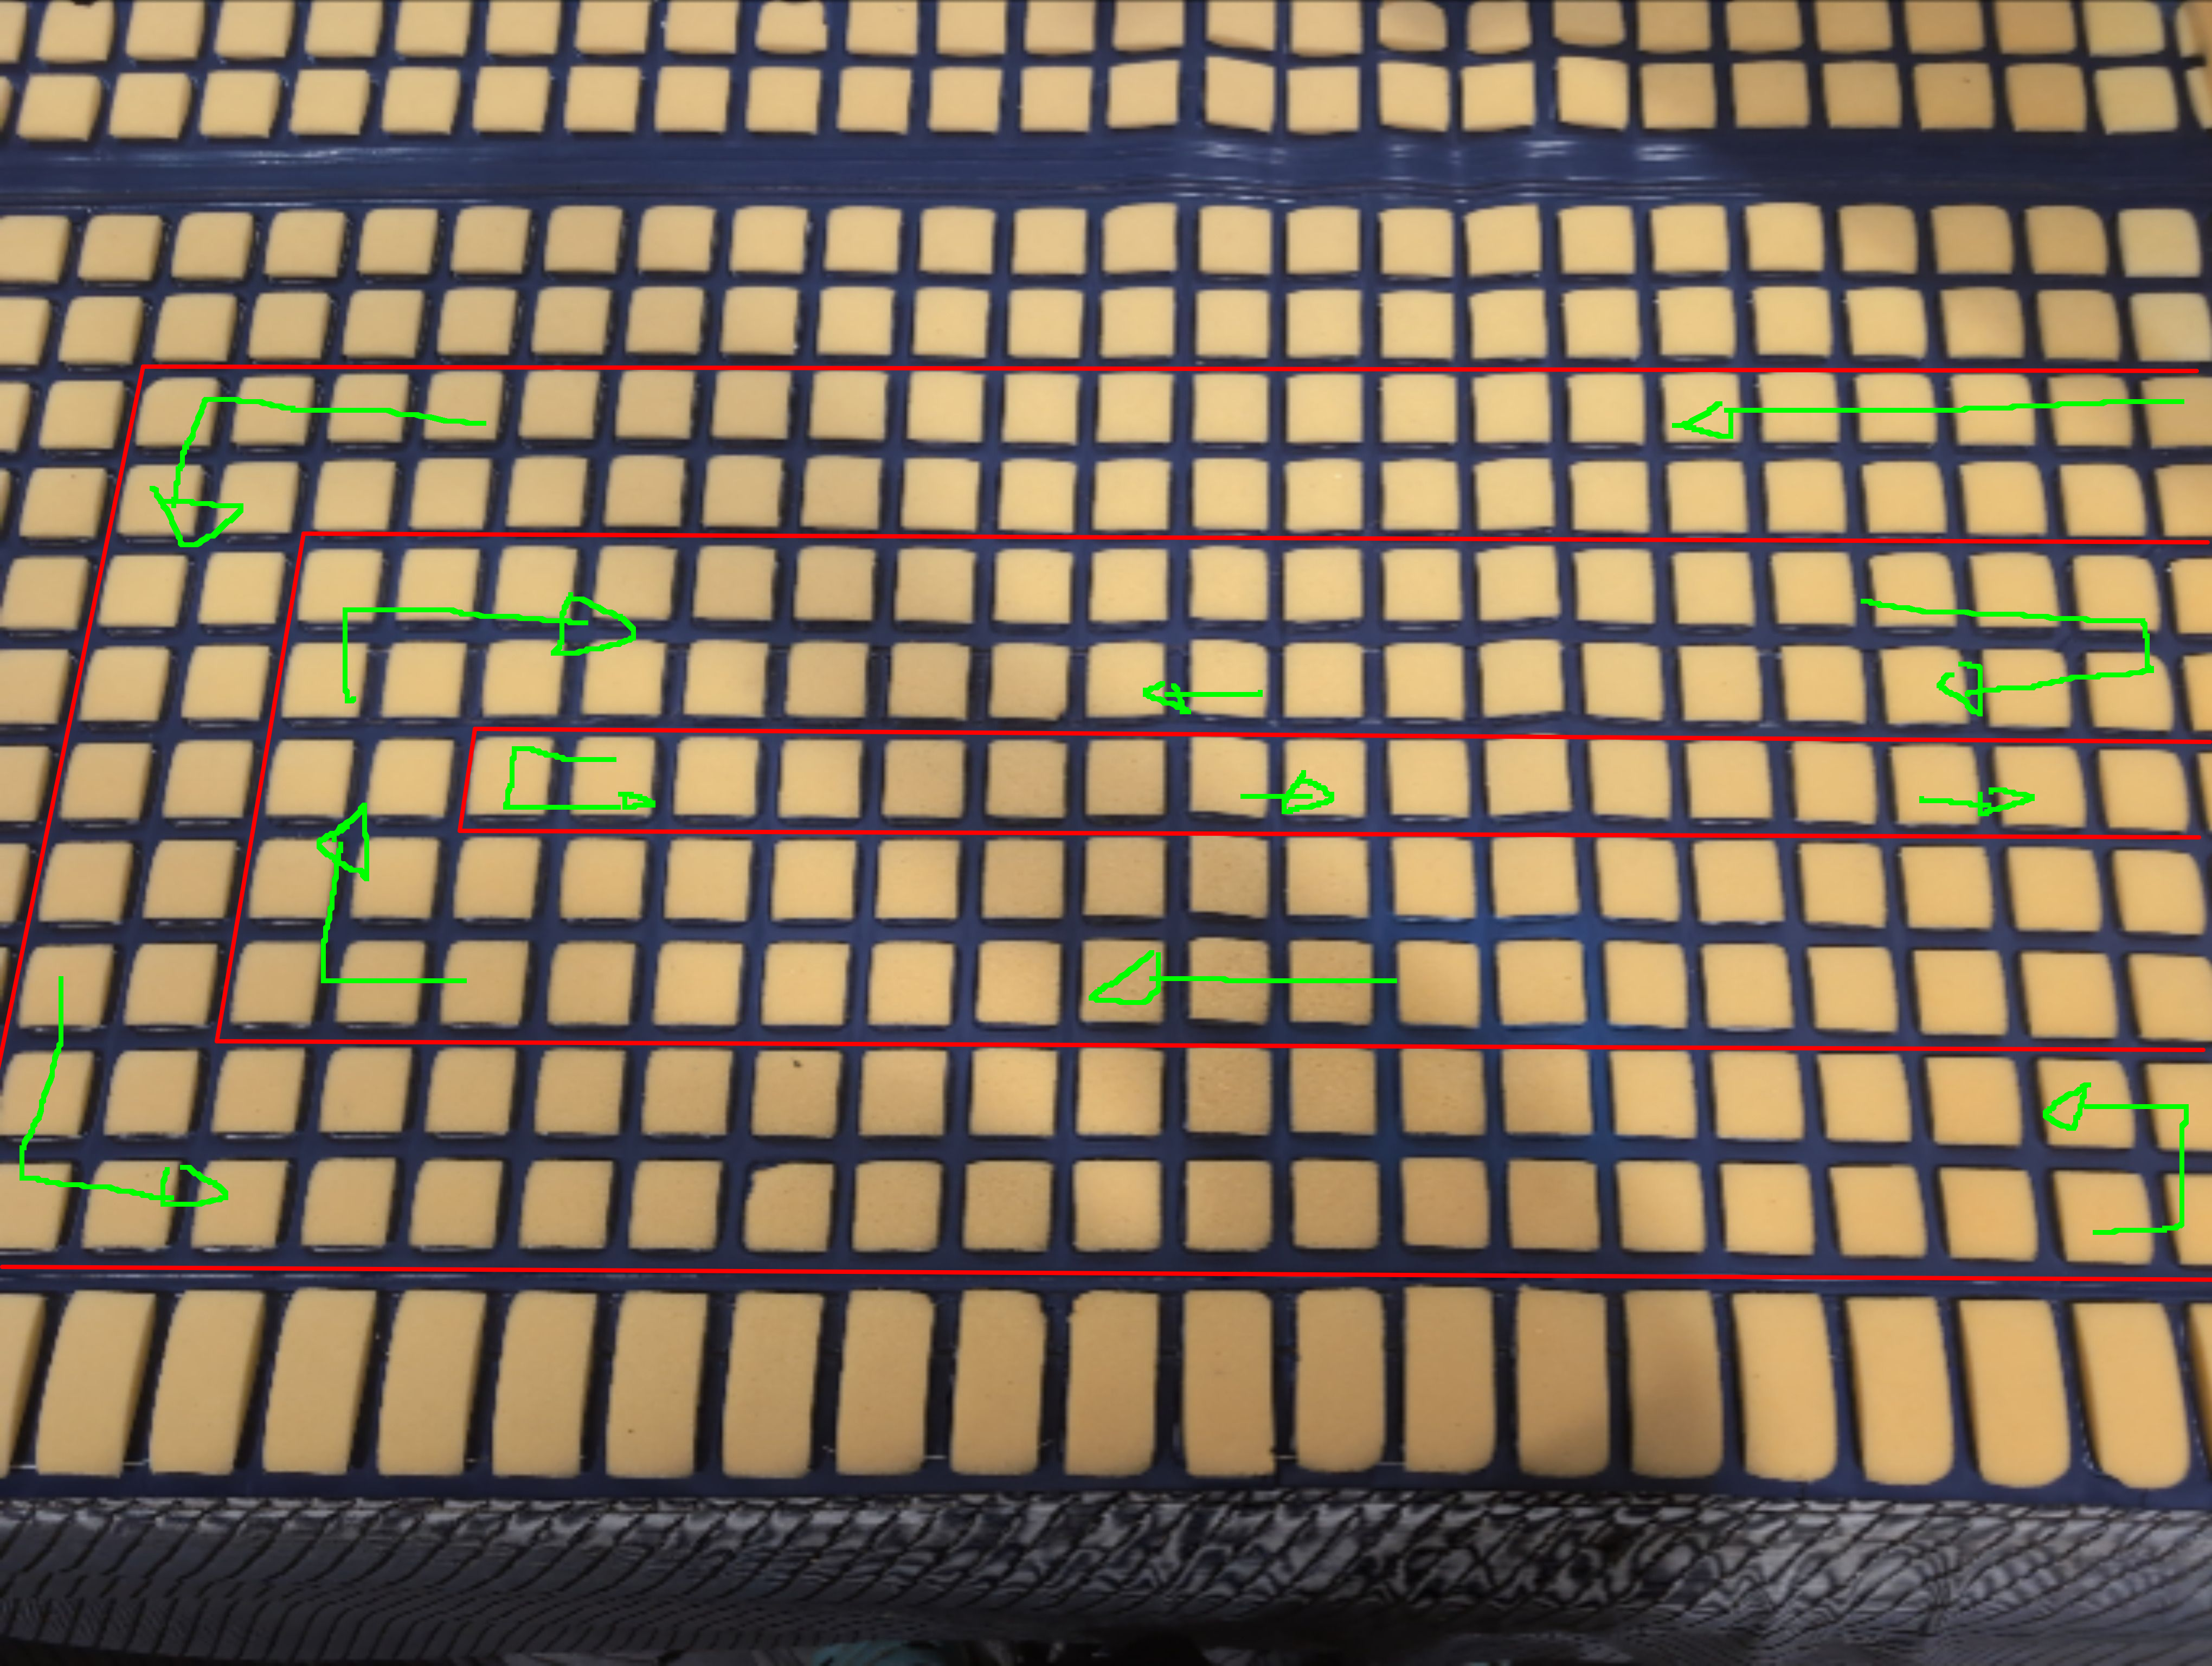
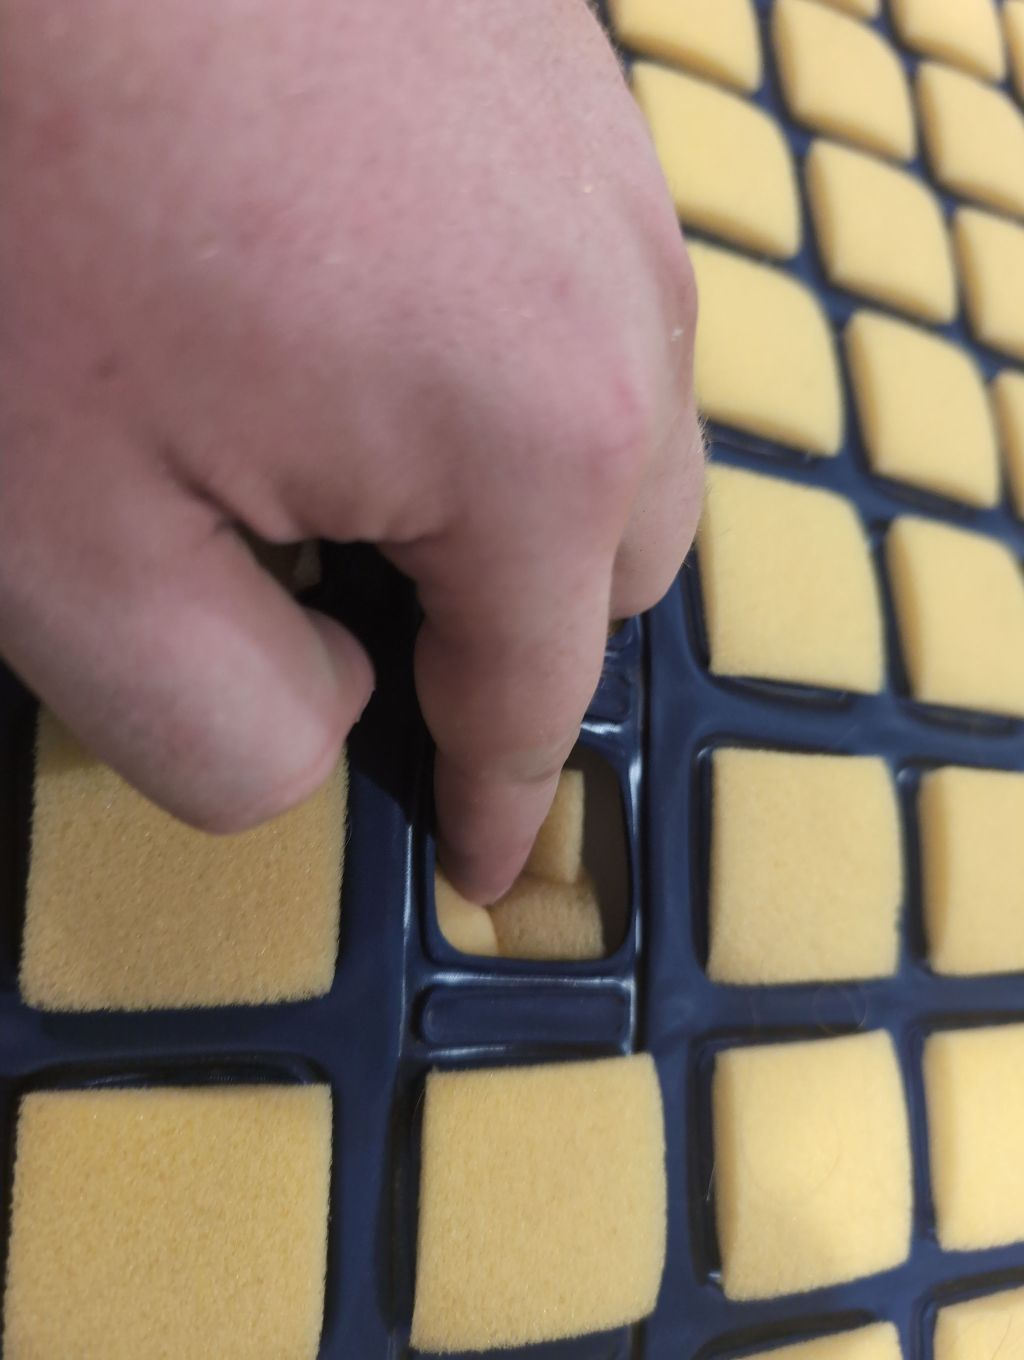
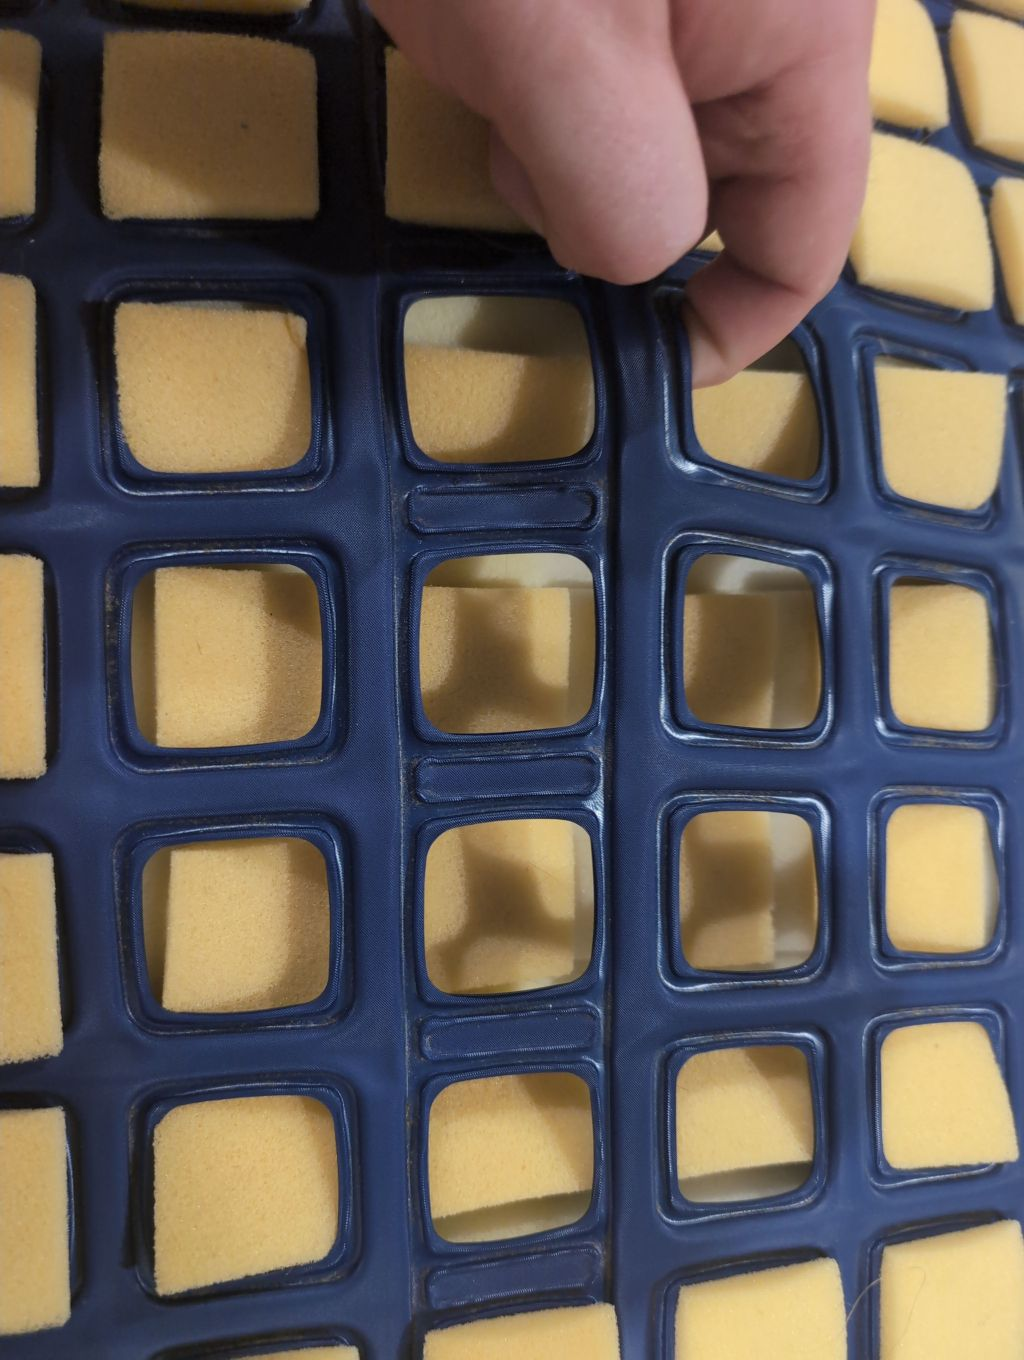
Now for the tedious part. You need to pull the vinyl up out of each of the foam sections
 |
 |
|---|
You're doing terrific. I guess. I don't know, but this part is hard to mess up. Anyway, once you have this done across that side of the bed your next task to is fish the tube along the underside of the vinyl. This will help keep things aligned as well as give you a FAR more comfortable surface to lay on.
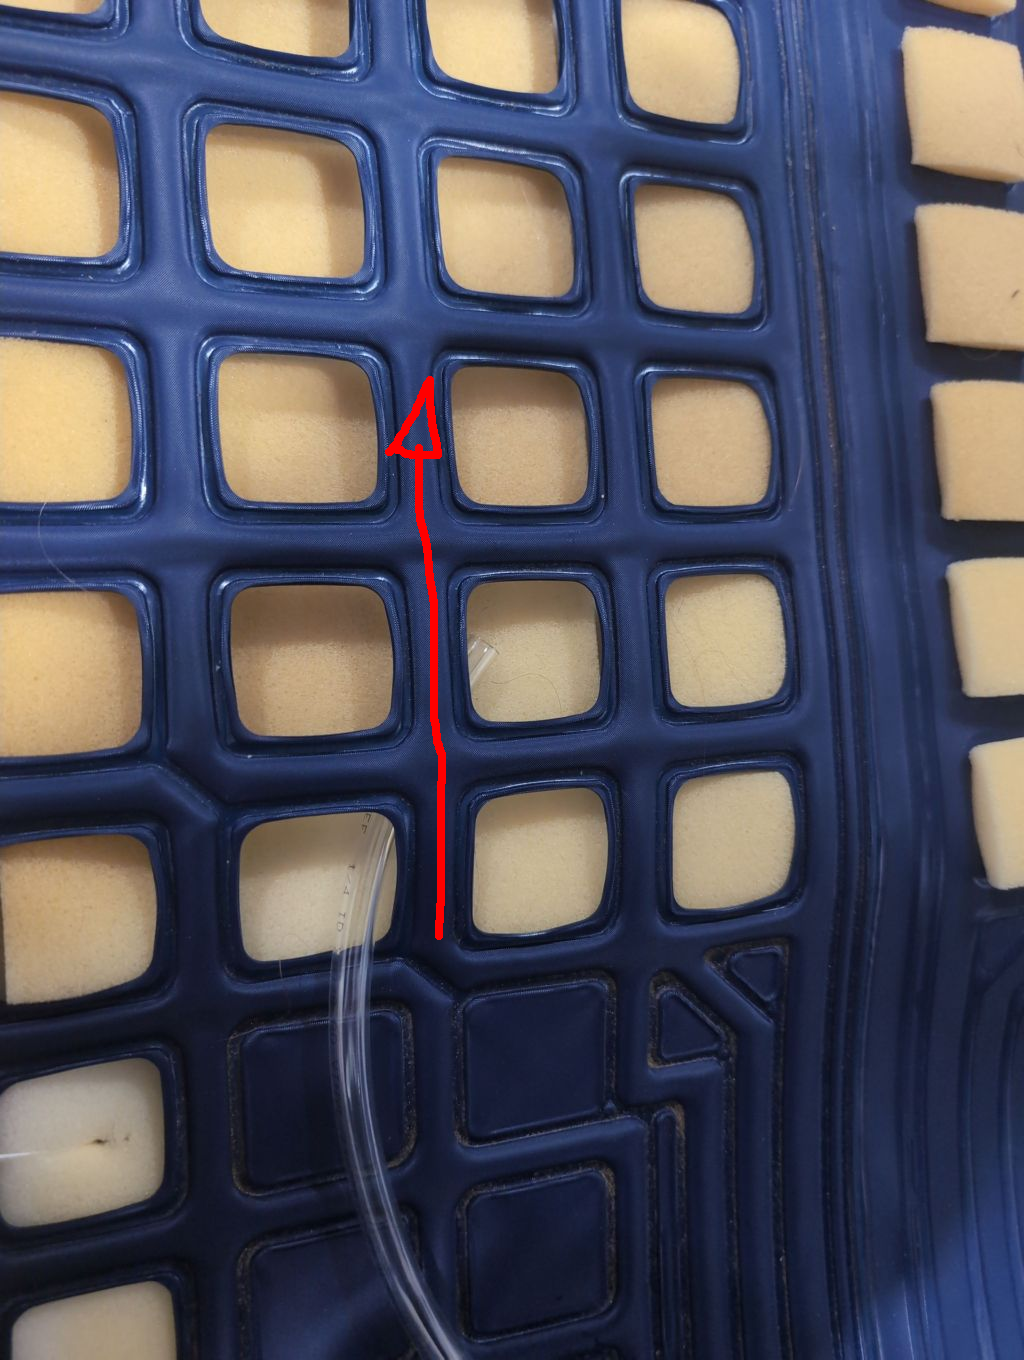
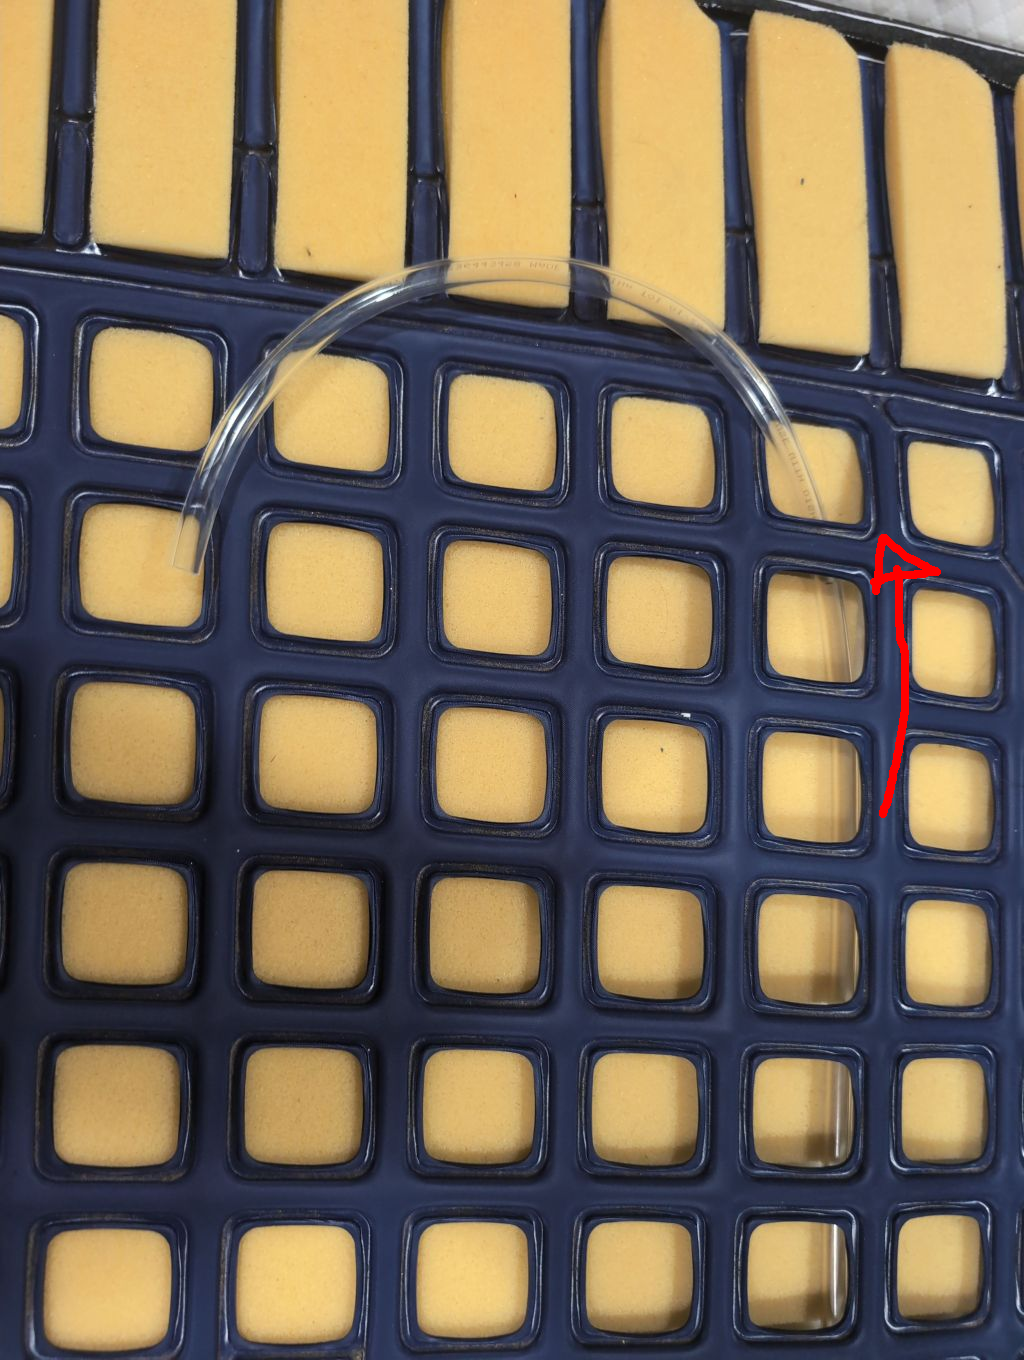
Starting from the middle of the bed, skip the first row of the crosshatch, and feed the hose through to the bottom of the bed (from the head side to the feet side):
 |
 |
|---|
Then we will want to put our first loops of velcro down. Keep it loose so you can keep feeding the hose through. Just leave yourself a couple feet of tubing left where you started feeding it in so you can reach the factory tubes. Trust me, give yourself like 6" or so of extra slack. You can always trim off extra later. You wont need the full 50'.
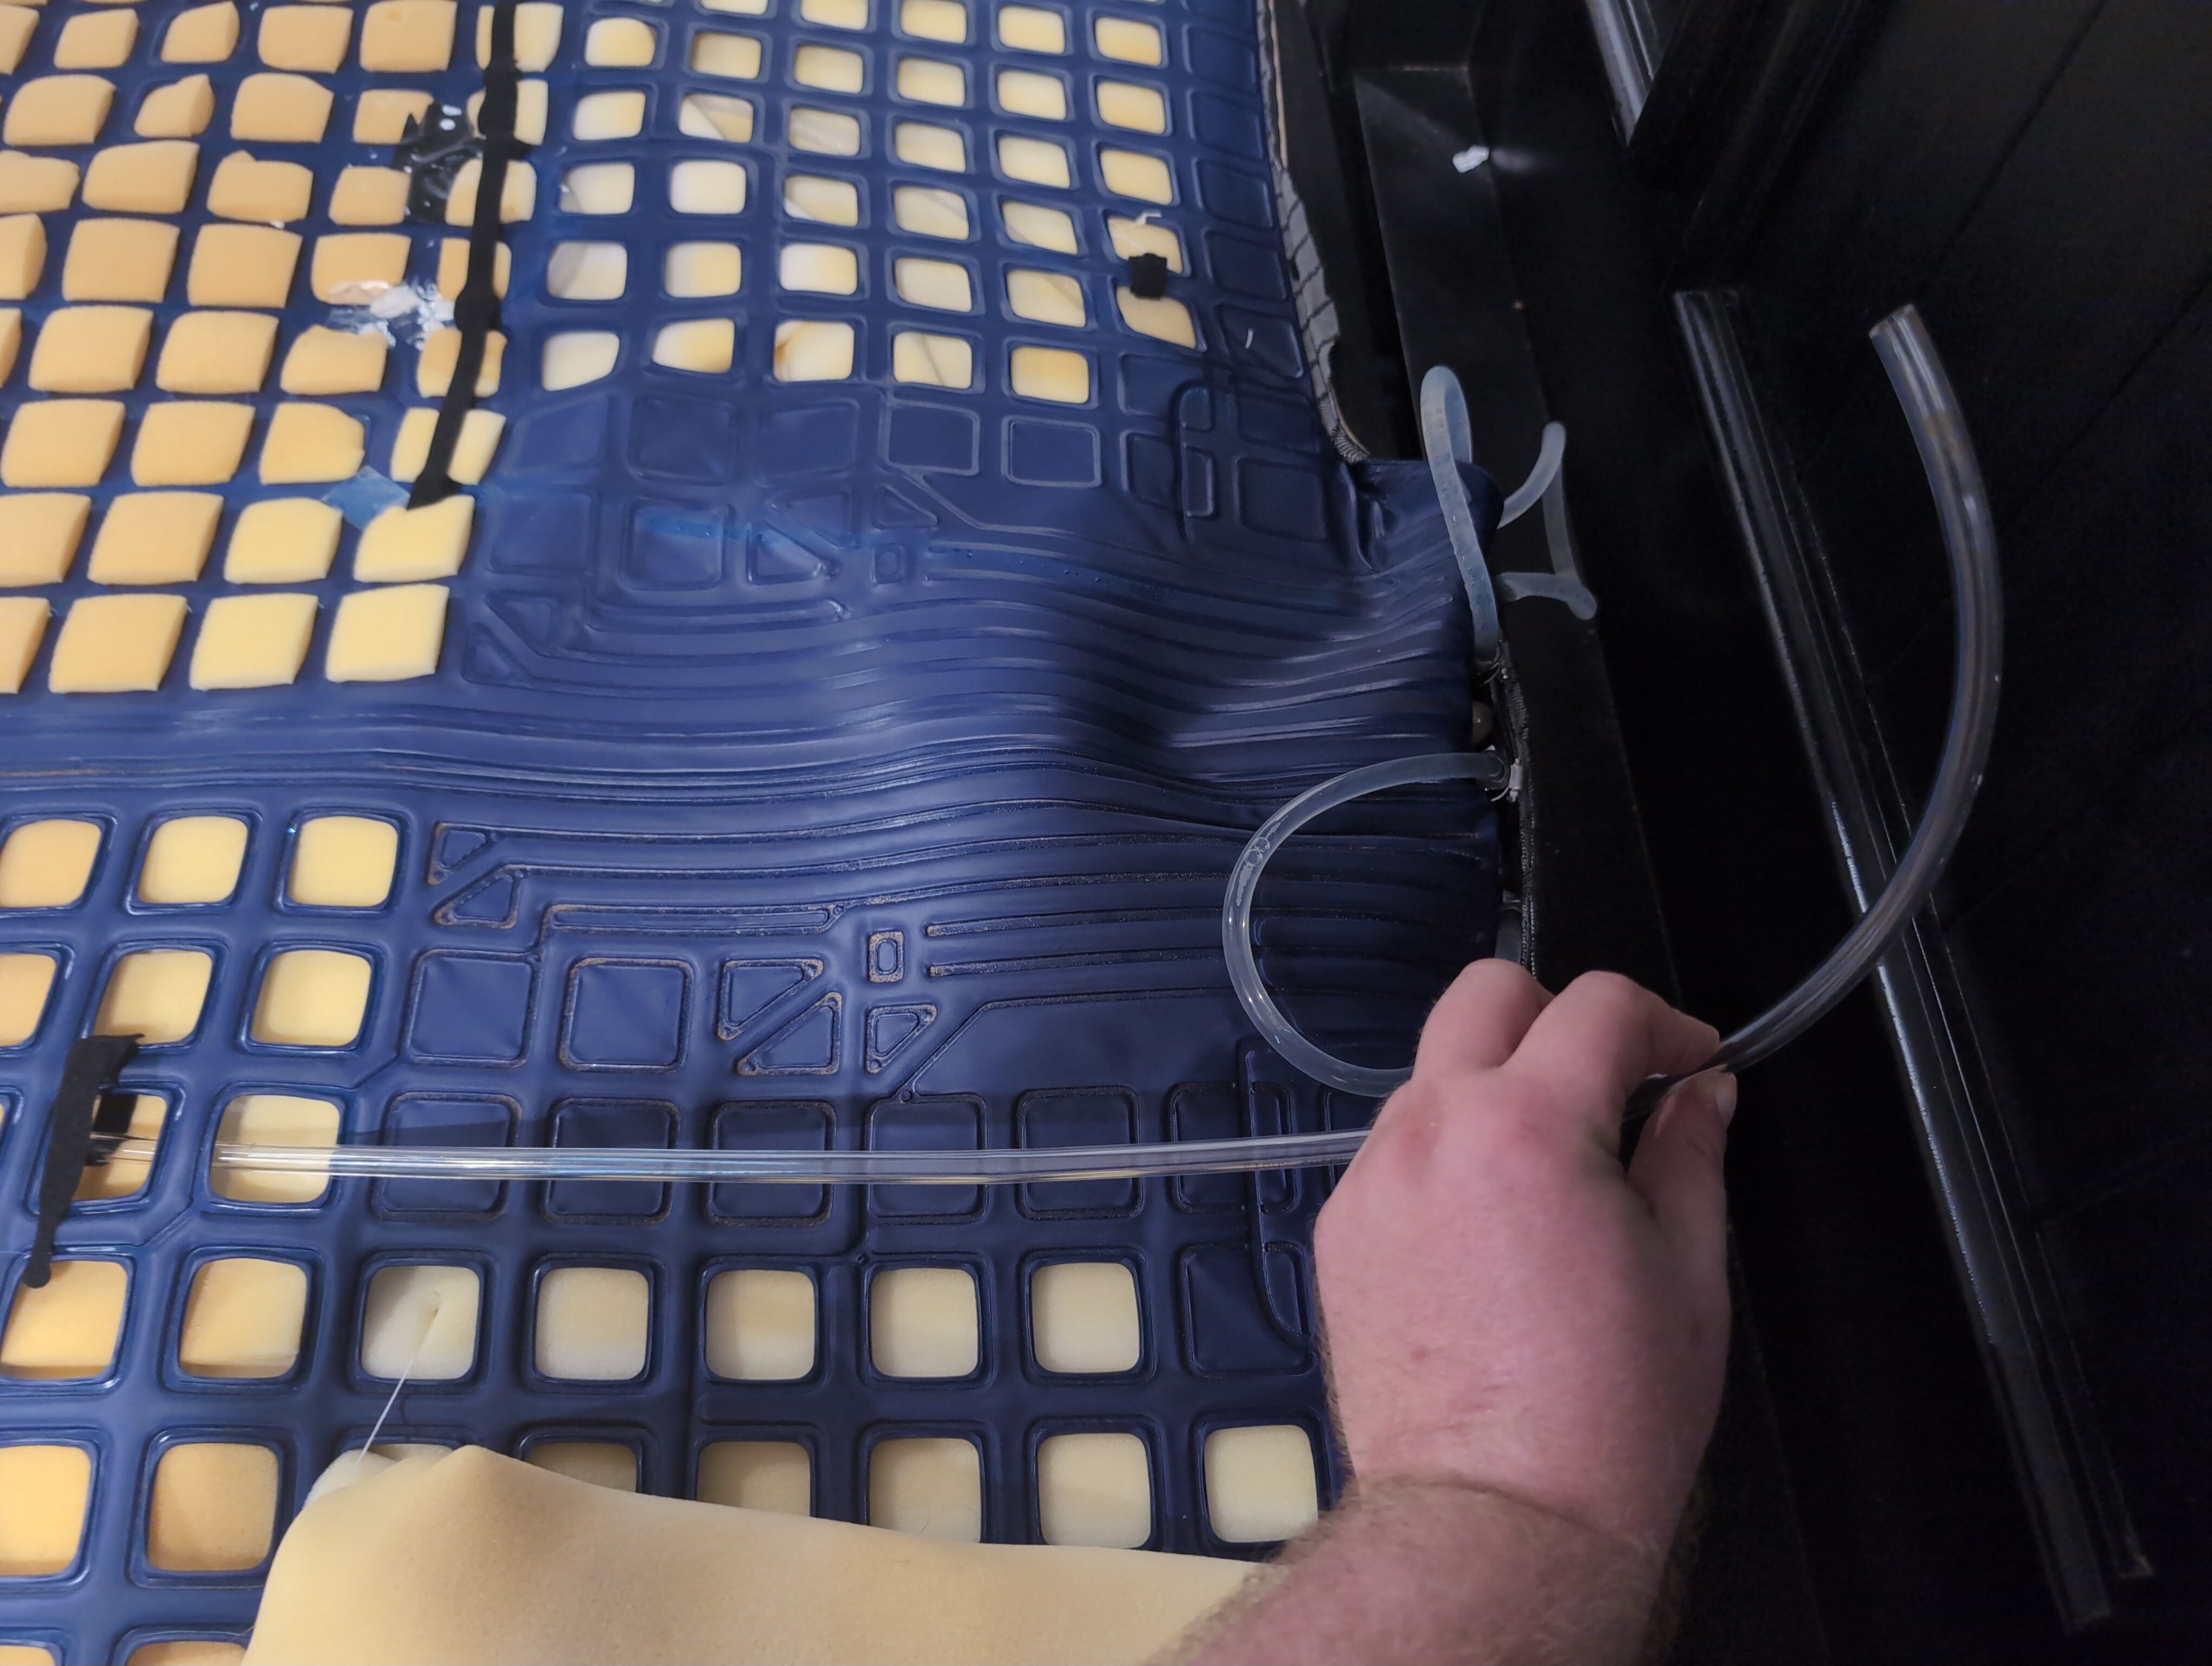
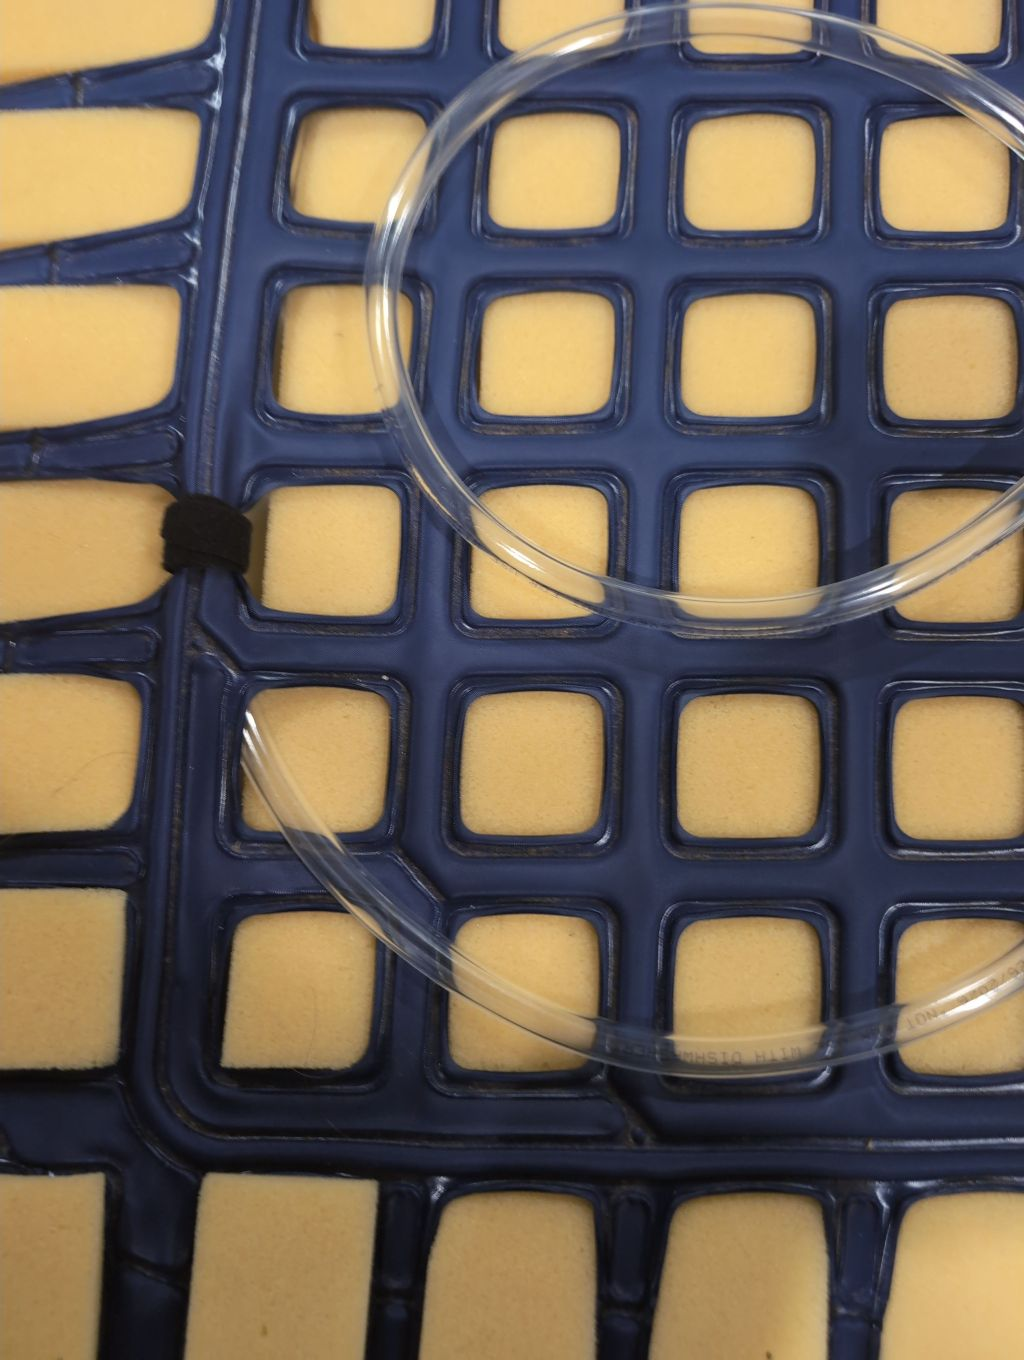
Now we change direction, finish the U, and keep going per our previous outline plan. As you pull the vinyl all the way though, tightly wrap the hose and vinyl with the velcro. I recommend doing so in a straight line, that way you can better secure them later to give your bed a bit more support.
 |
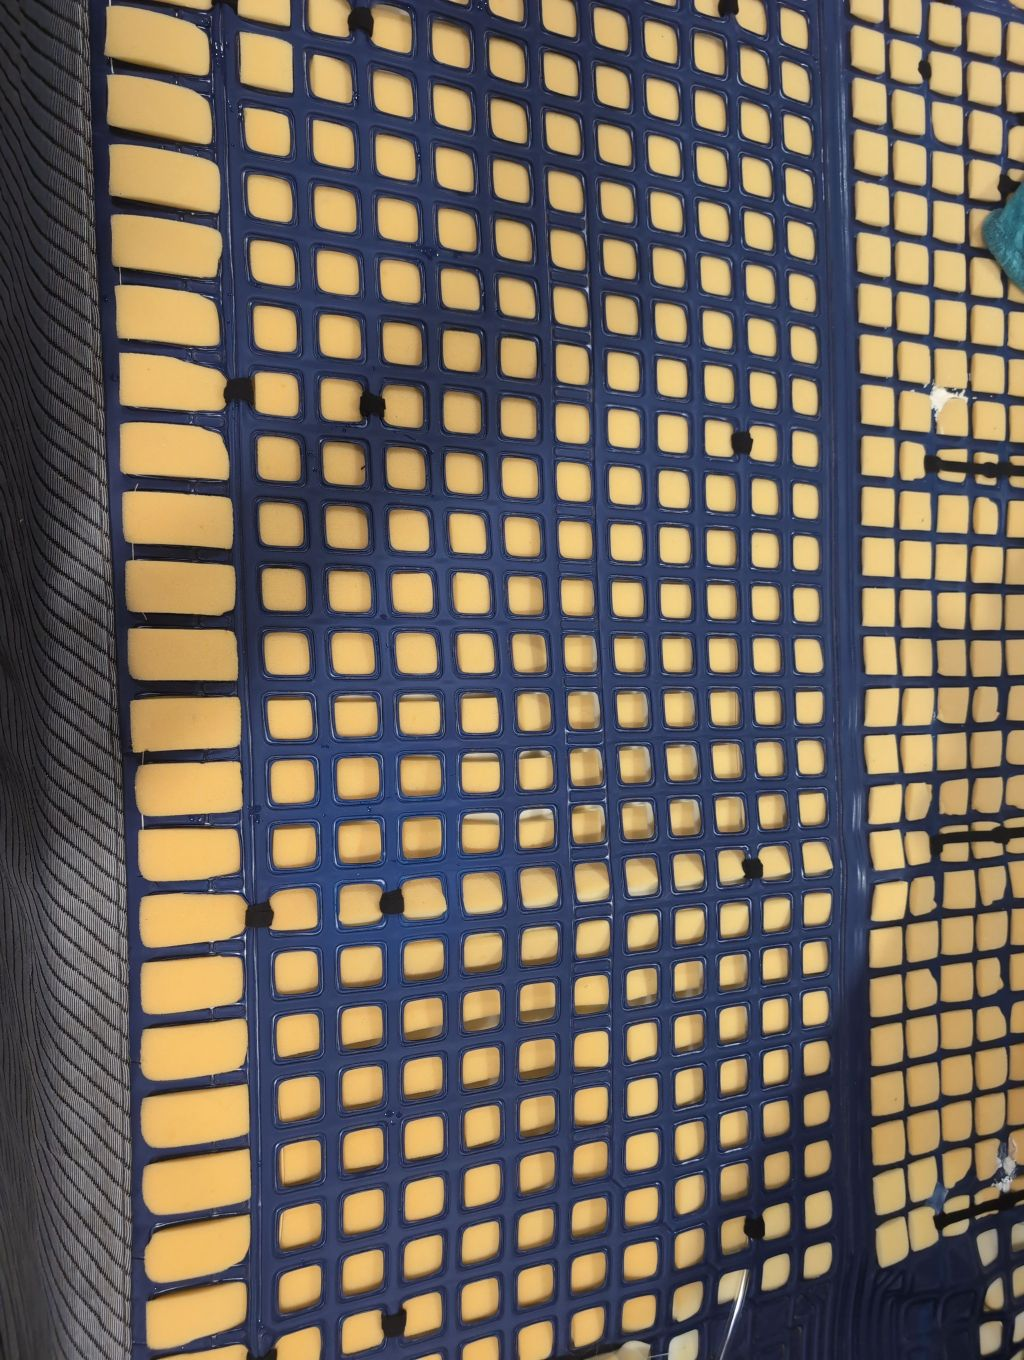 |
|---|
Once you have the tubes ran, route your ends under the flat area to where your tubes connect to the hub.
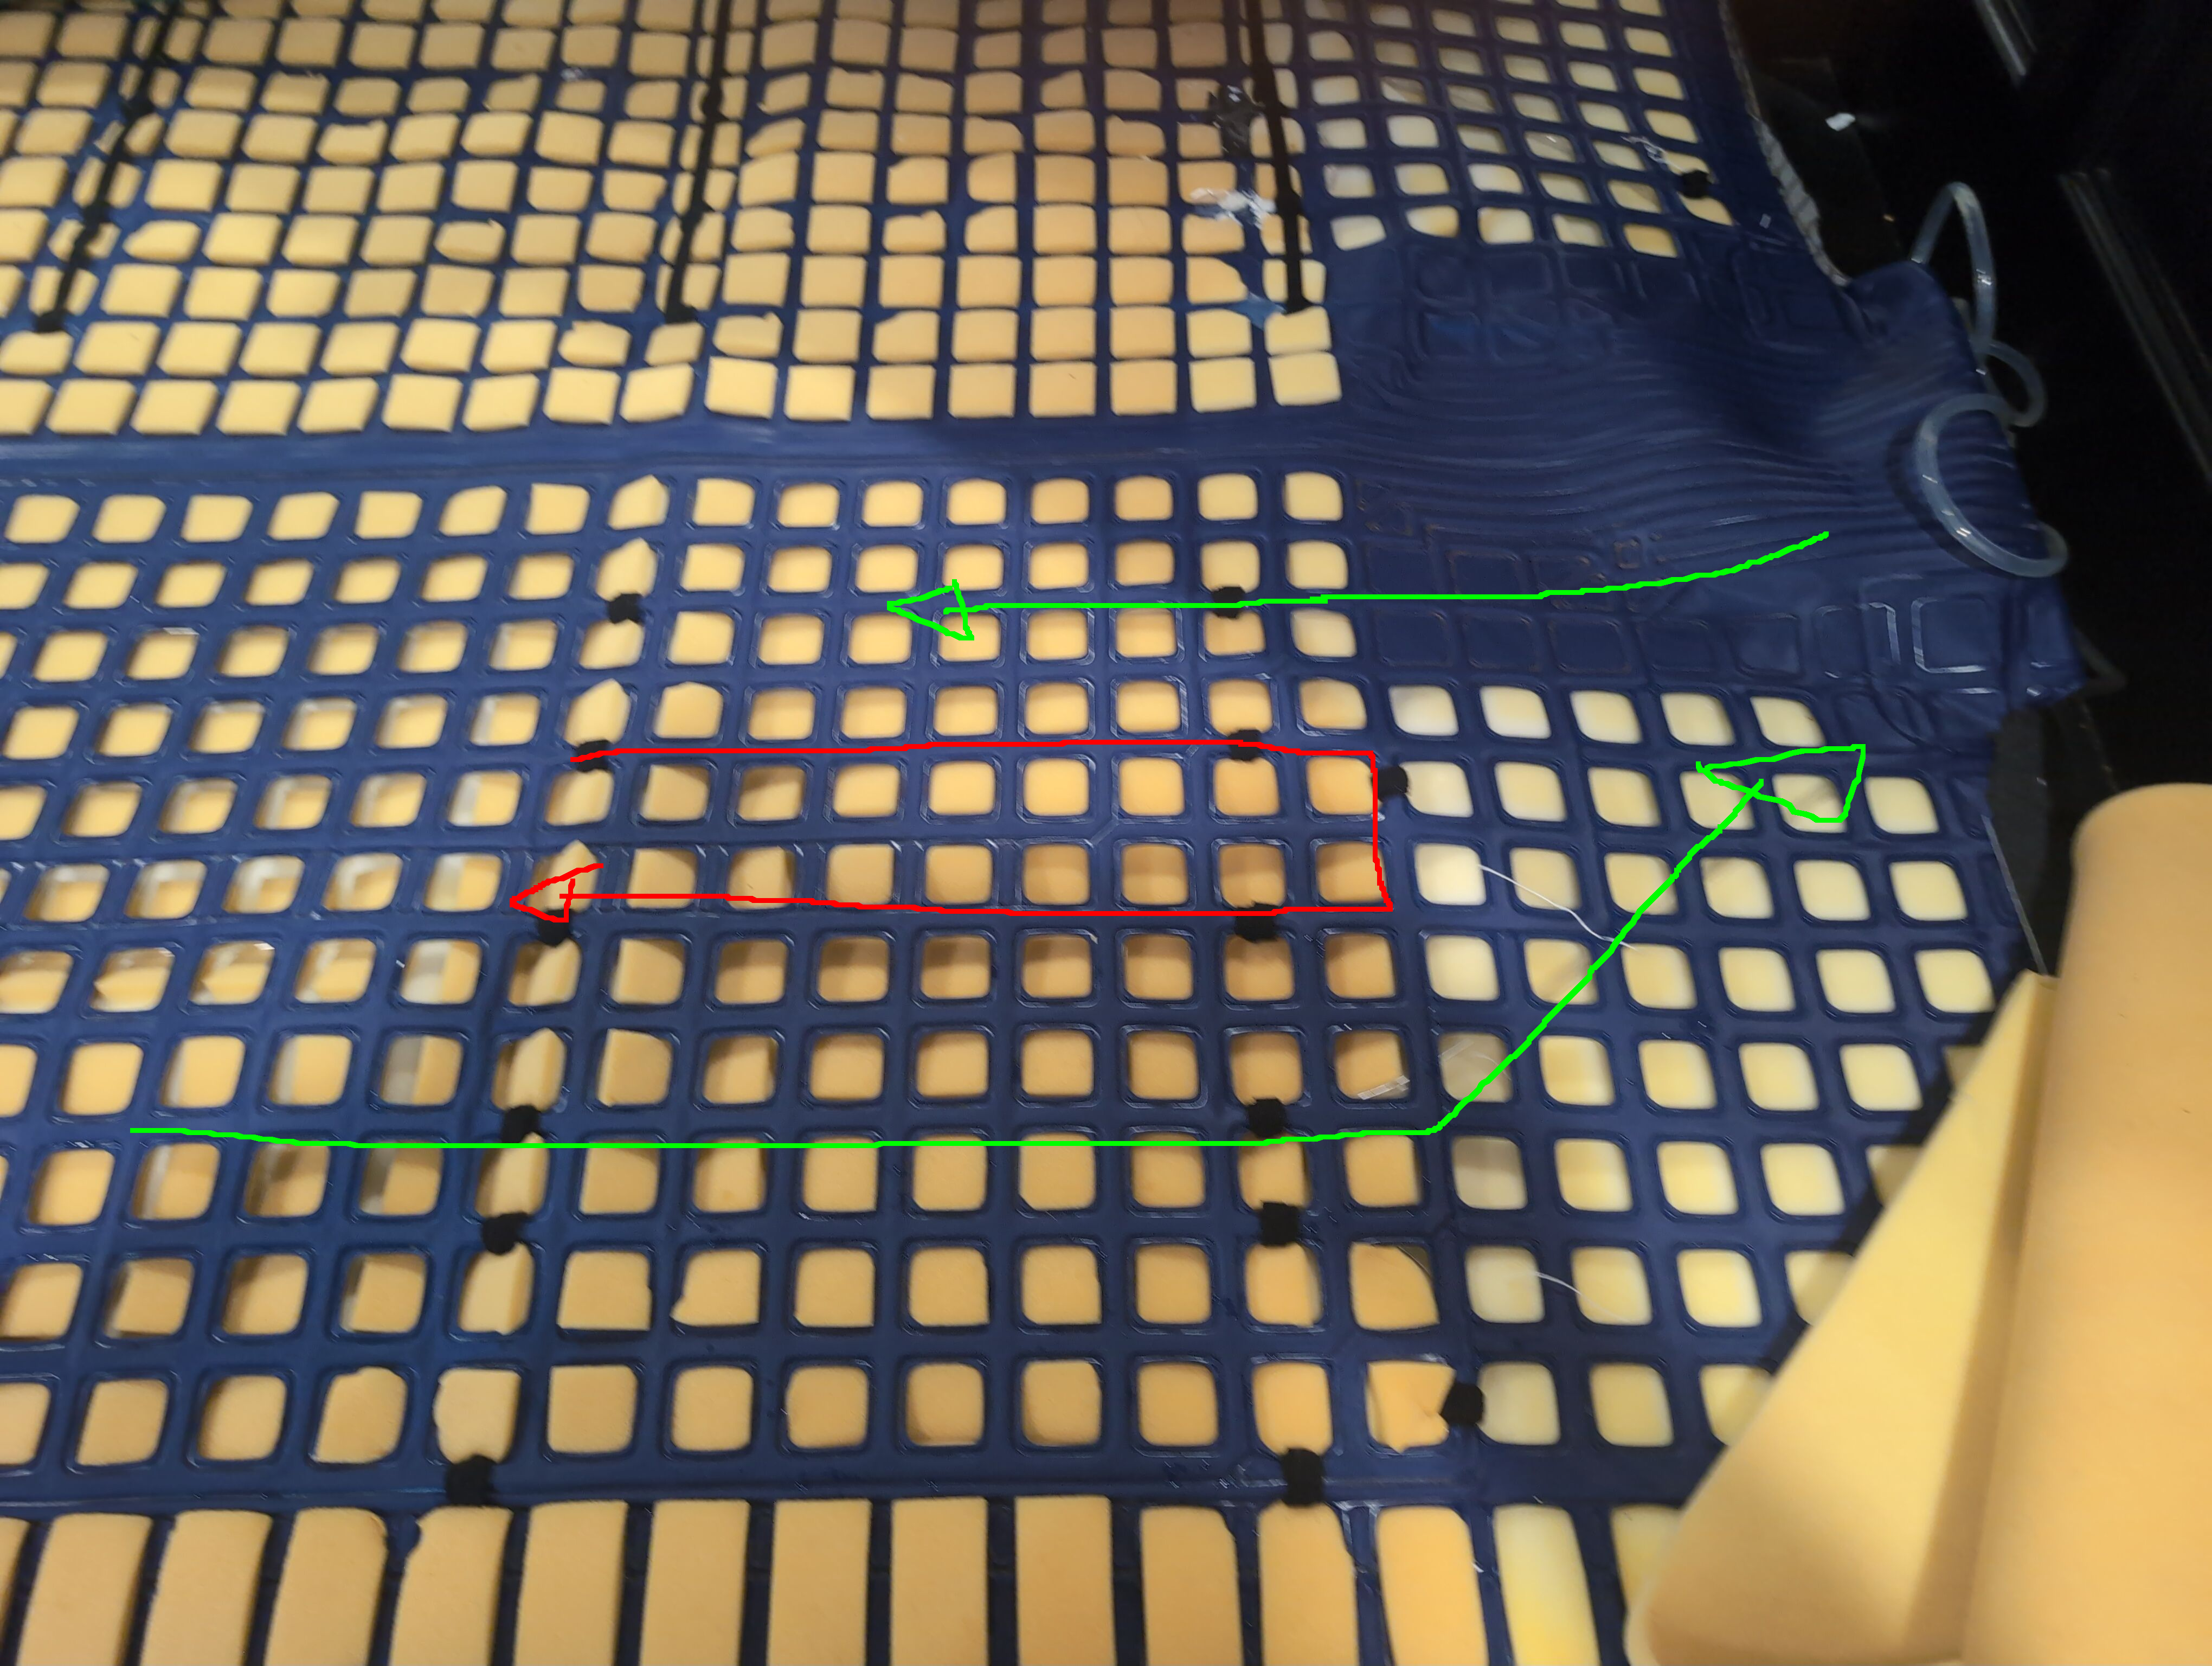
Once you have this done, the hard part is over. Not that this was exactly hard but it was absolutely a pain. Very tedious. But hey, now all we have to do is hook up the hose. First, we will need to remove the black tubing from the original vinyl active mesh. Then, we add our hose clamps to our tube, and insert the tube into the original hose. Try to get about an inch inside the hose before securing with the clamp.
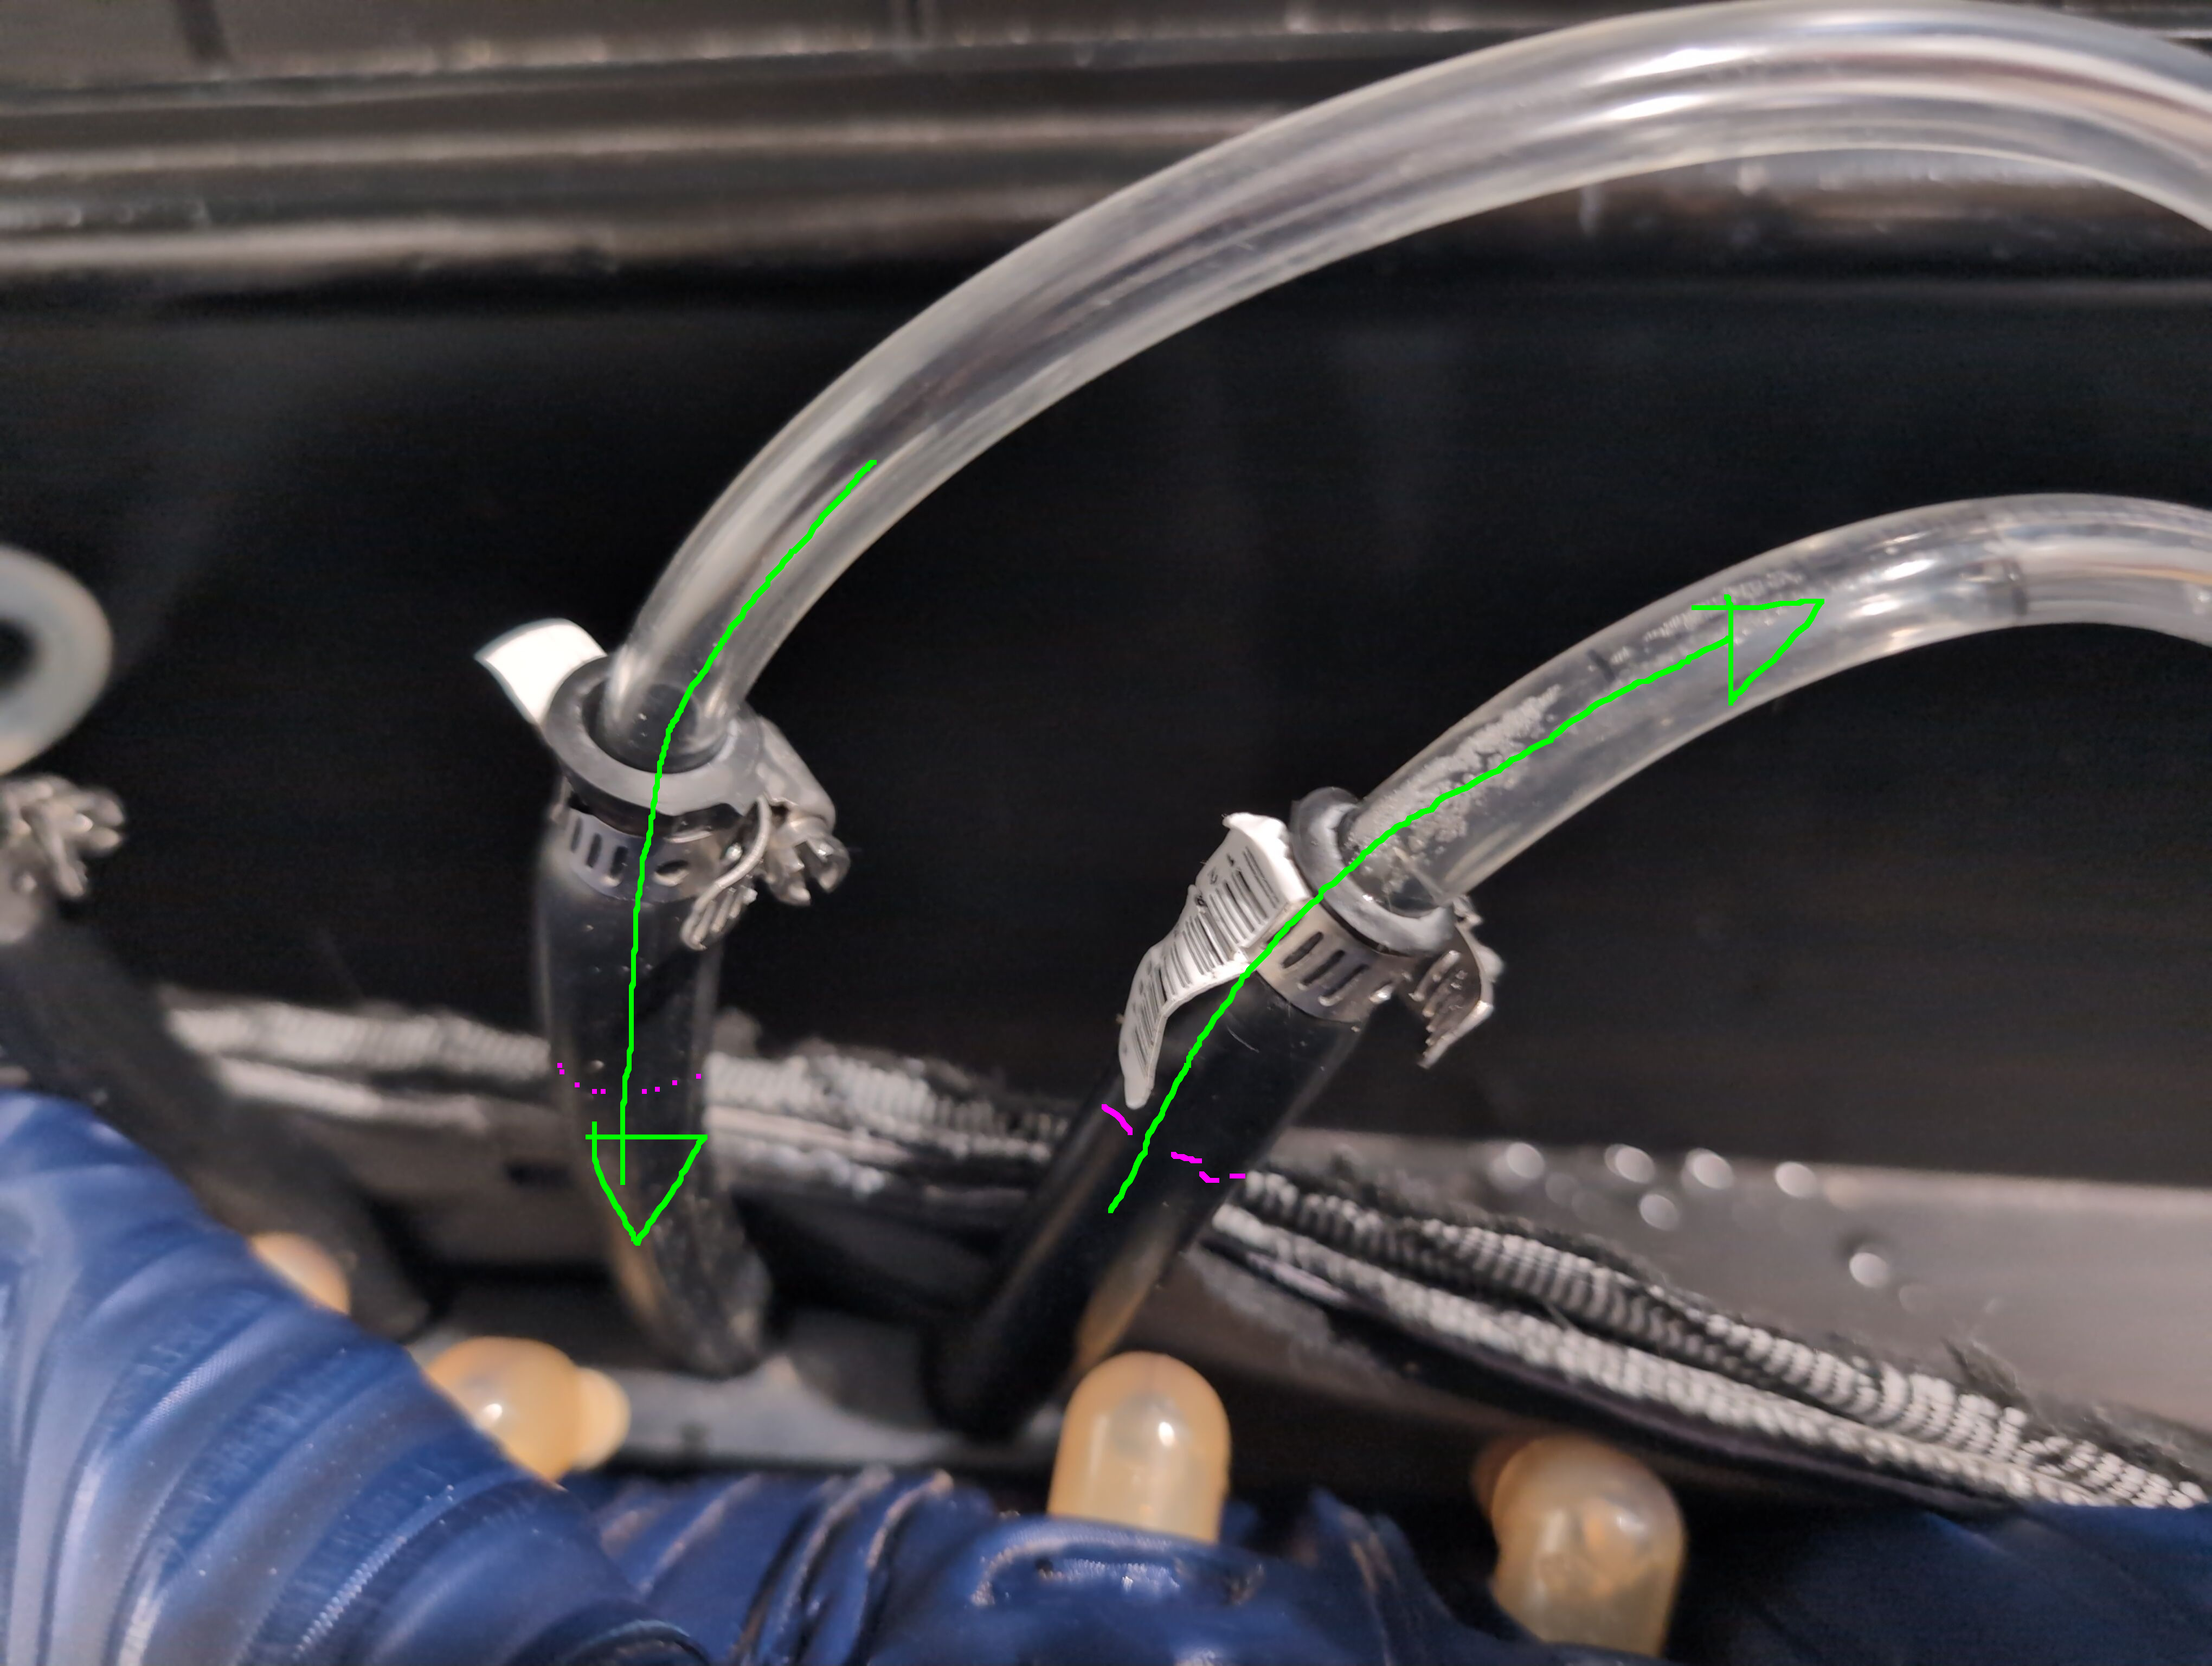
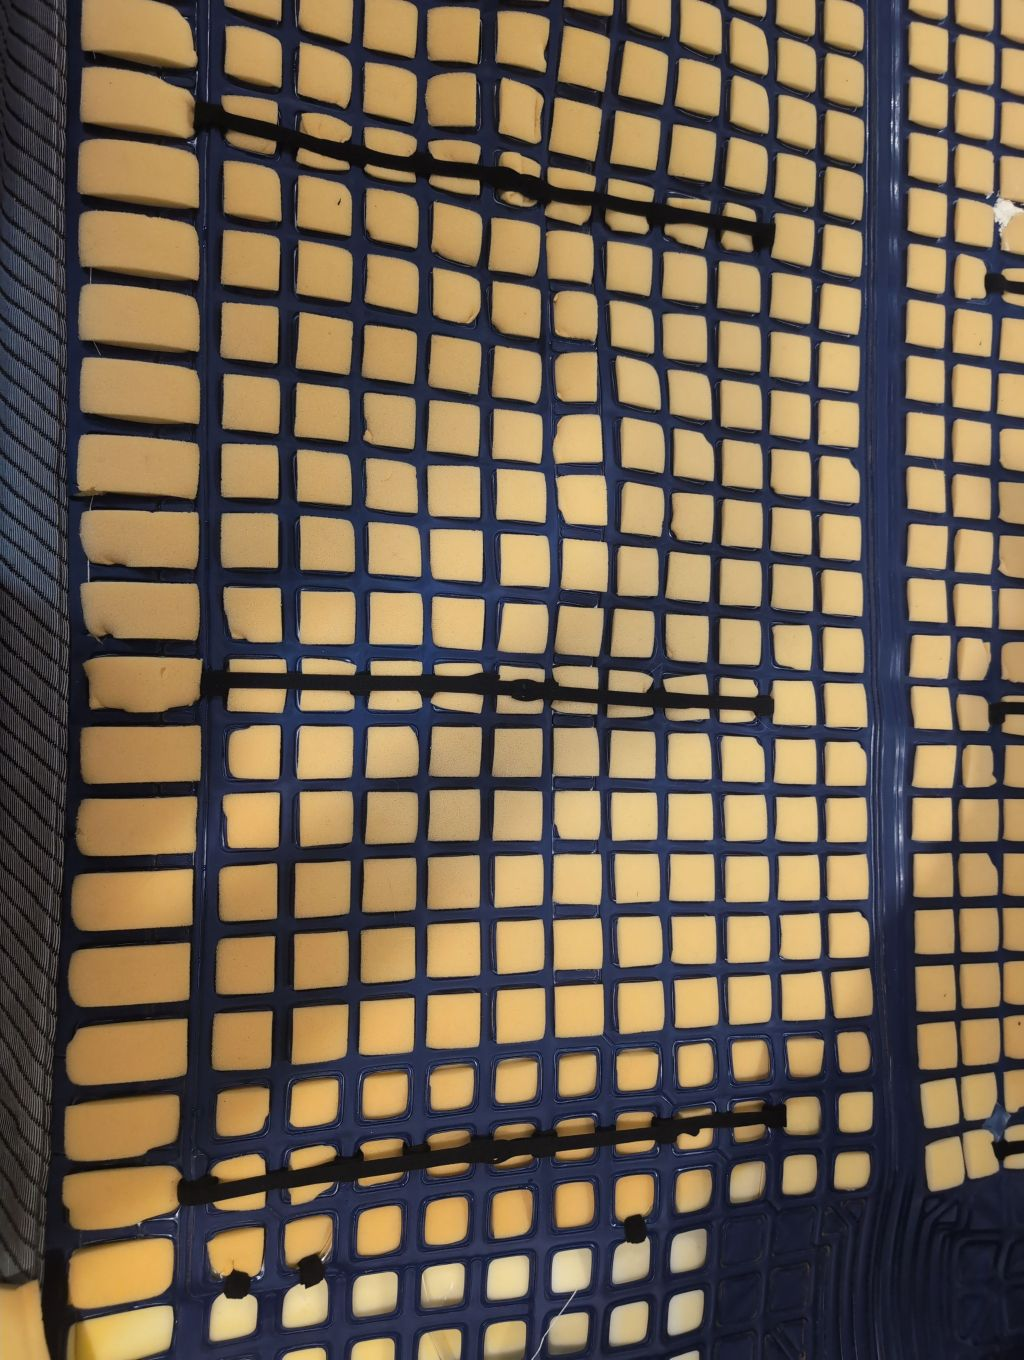
There are 4 tubes total. The water comes in via the two in the center and then return out via the hoses on the outside. My recommendation is to connect the start of the 'U' (The stretch we started with, on the inside) and where the finished (the tubing in the center) we feed out. But your preference might vary. I just like my extremities to have the more extreme temperature difference. Once connected, you can turn on the bed and test the flow. Start the priming, etc. If you disconnected both sides, you need to AT LEAST use some of your leftover hose to connect between the two sides so it doesn't leak while you test this. You can do just one side at a time if only one side has a leak. Now the final bit. We need to pull the foam up through the holes and finish the velcro in rows for support. I just grab the the center and shake it in little circles and it tends to come right up.
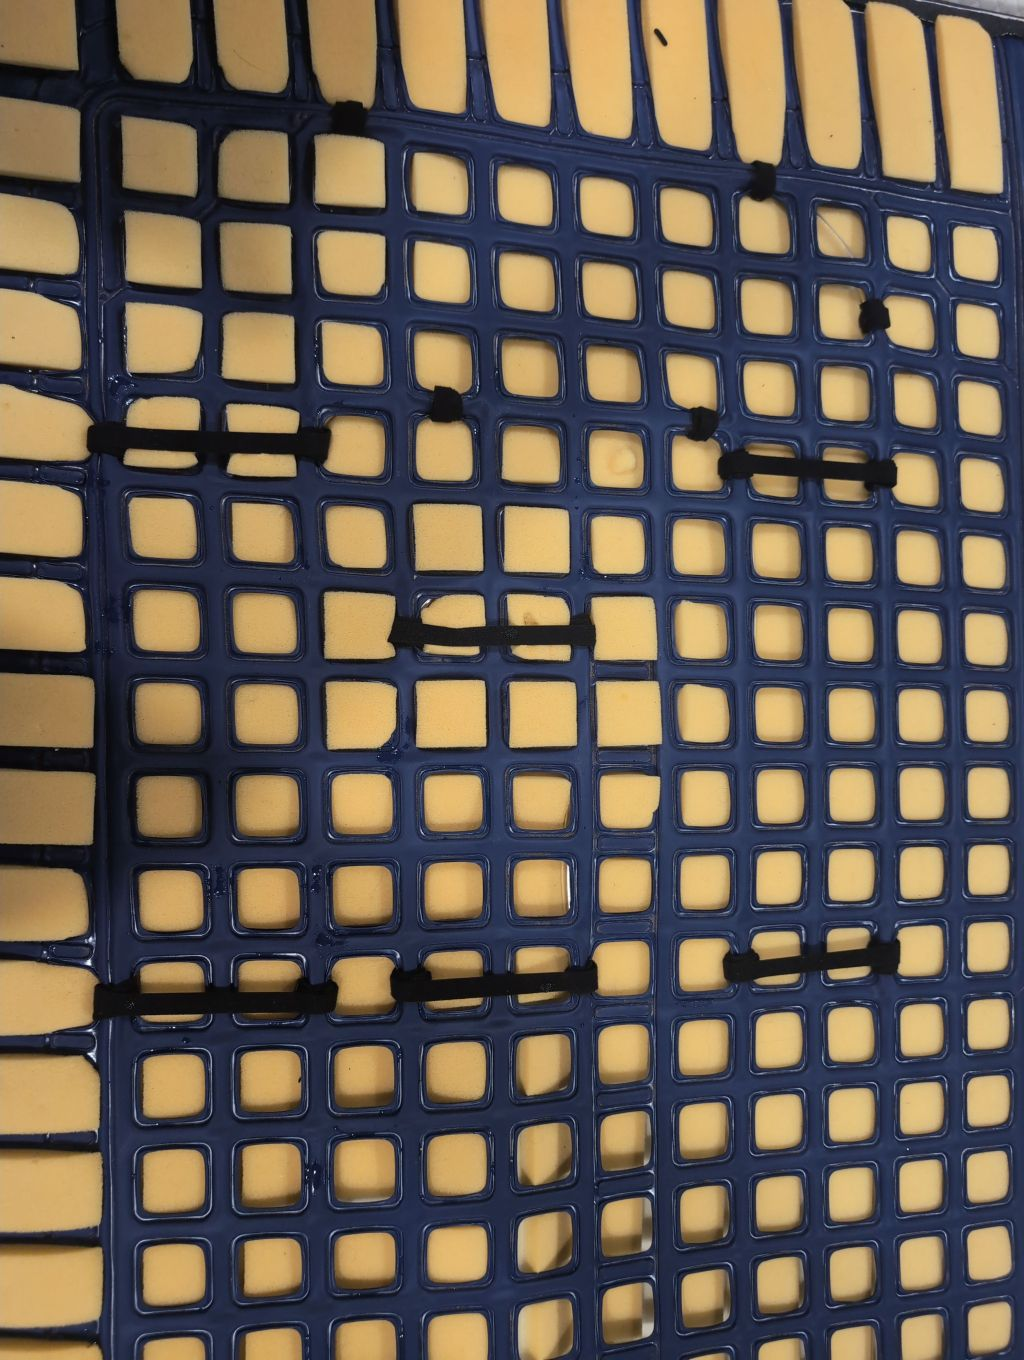 |  |
Cover with a bedsheet and enjoy your drastically stronger Pod Pro mattress cover. From my testing, the heating will be as effective as it ever was. The cooling is... probably 85% as efficient? The downside is the thicker vinyl and the 'skipping every other tube' means less surface area to exchange heat from your skin. I'll be working on how we can improve this.
No comments yet.